Quickstart
Django configuration
Requires Django >= 2.0 and PostgreSQL >= 9.4.
- Install django-slackchat-serializer using pip.
$ pip install django-slackchat-serializer
- Add slackchat-serializer to your installed apps and create the minimum required token configuration to interact with Slack.
# project/settings.py

INSTALLED_APPS = [
    # ...
    'rest_framework',
    'foreignform',
    'slackchat',
]

SLACKCHAT_SLACK_VERIFICATION_TOKEN = os.getenv('SLACK_VERIFICATION_TOKEN')
SLACKCHAT_SLACK_API_TOKEN = os.getenv('SLACK_API_TOKEN')
- Add slackchat to your project’s
urls.py.
# project/urls.py

urlpatterns = [
  # ...
  path('slackchat/', include('slackchat.urls')),
]
- Slackchat uses Celery to process some tasks asynchronously. Read “First steps with Django” to see how to setup a Celery app in your project. Here is a configuration you can also use to start:
# project/celery.py
import os

from celery import Celery
from django.conf import settings

os.environ.setdefault('DJANGO_SETTINGS_MODULE', '<your project>.settings')

app = Celery('slackchat')
app.config_from_object('django.conf:settings', namespace='CELERY')
app.conf.update(
  task_serializer='json'
)
# Use synchronous tasks in local dev
if settings.DEBUG:
  app.conf.update(task_always_eager=True)
app.autodiscover_tasks(lambda: settings.INSTALLED_APPS, related_name='celery')
# project/__init__.py from .celery import app as celery_app __all__ = ['celery_app']
- Run migrations.
$ python manage.py migrate slackchat
Slack configuration
- Create a new app for your team in Slack.
- Grab your app’s verification token (for
SLACKCHAT_SLACK_VERIFICATION_TOKEN).

- From the OAuth & Permissions section, get your app’s OAuth Access Token (for
SLACKCHAT_SLACK_API_TOKEN).

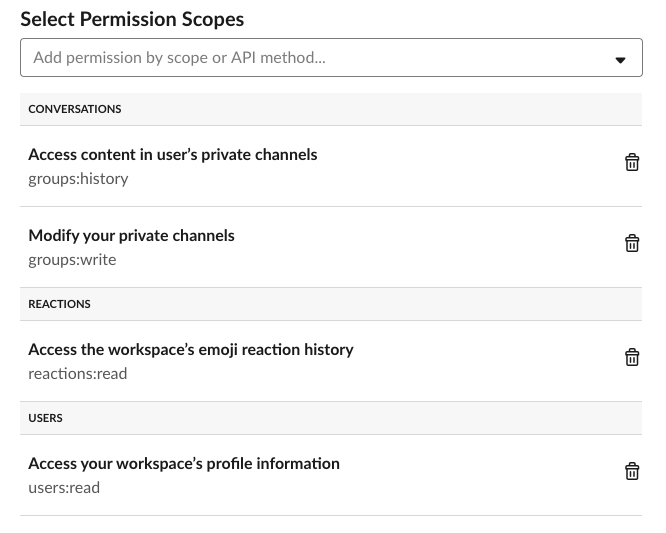
- Add these permission scopes:
groups:history,groups:write,reactions:read,users:read.
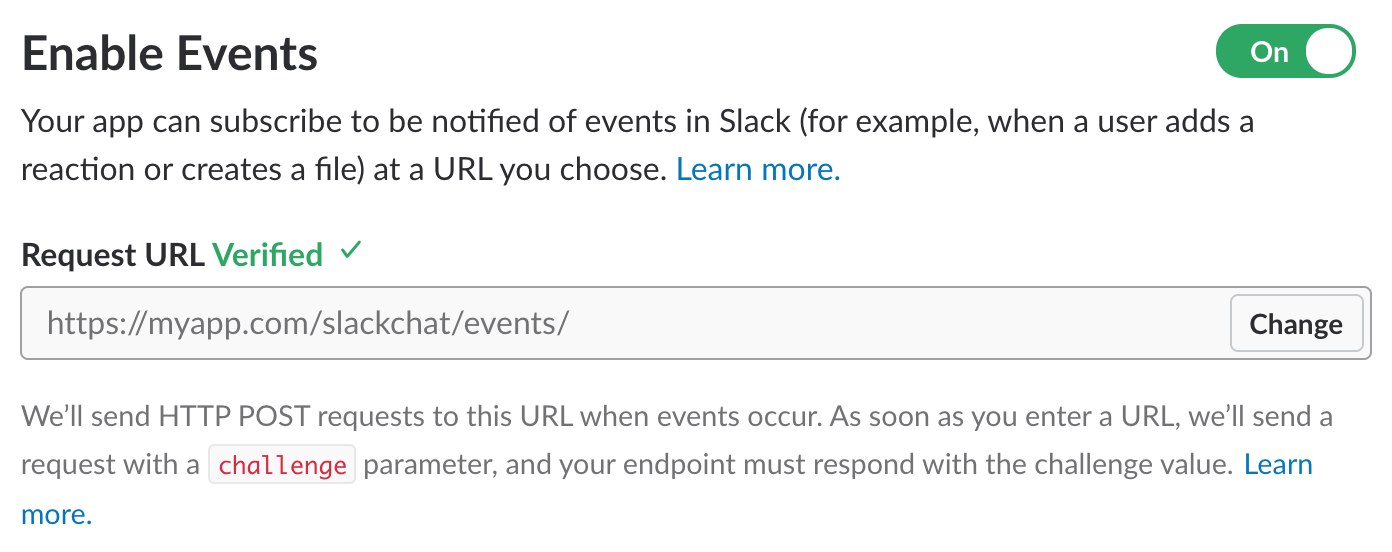
- Enable events subscriptions in your app and configure the Request URL to hit slackchat-serializer’s events endpoint. (Slackchat will automatically verify the URL with Slack.)
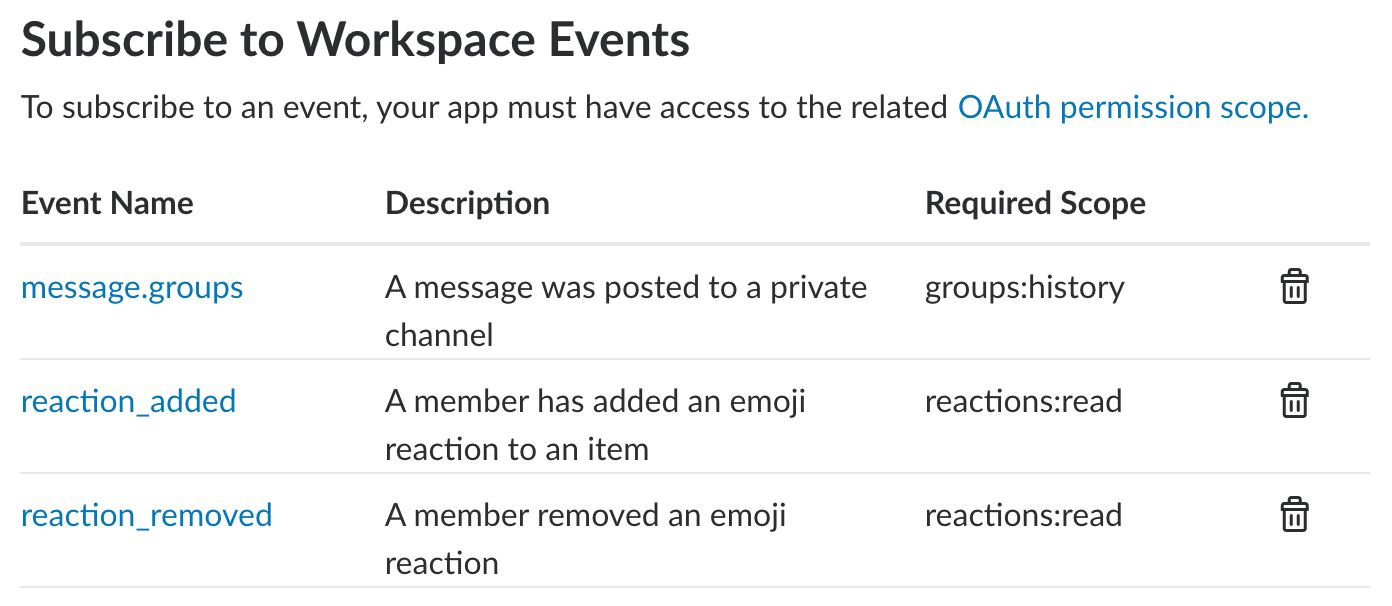
- Subscribe to these workspace events:
message.groups,reaction_addedandreaction_removed.
First slackchat
- Run a management command to seed your app with Slack users:
`
$ python manage.py get_slackchat_users
`
- Log into the Django admin.
- Create a new
ChatTypeinstance. - Create a new
Channelinstance, which will create a new private channel in Slack to host your slackchat. - Invite any other members you want to the group and start chatting!
Configuring locally
If you’re just trying out slackchat-serializer locally, we recommend using ngrok to proxy Django’s own development server to a public URL that Slack can hit with event messages.
If you’re running your development server on port 8000, for example, you can start an ngrok tunnel like this:
$ ngrok http 8000
Now grab the tunnel’s https URL and use it to configure the request URL in your Slack app’s event subscriptions.
Developing
Move into the example directory and start a pipenv shell.
$ pipenv shell
You can now develop using Django’s development server.